How to Identify Common Wheat Varieties by Grain and Ear
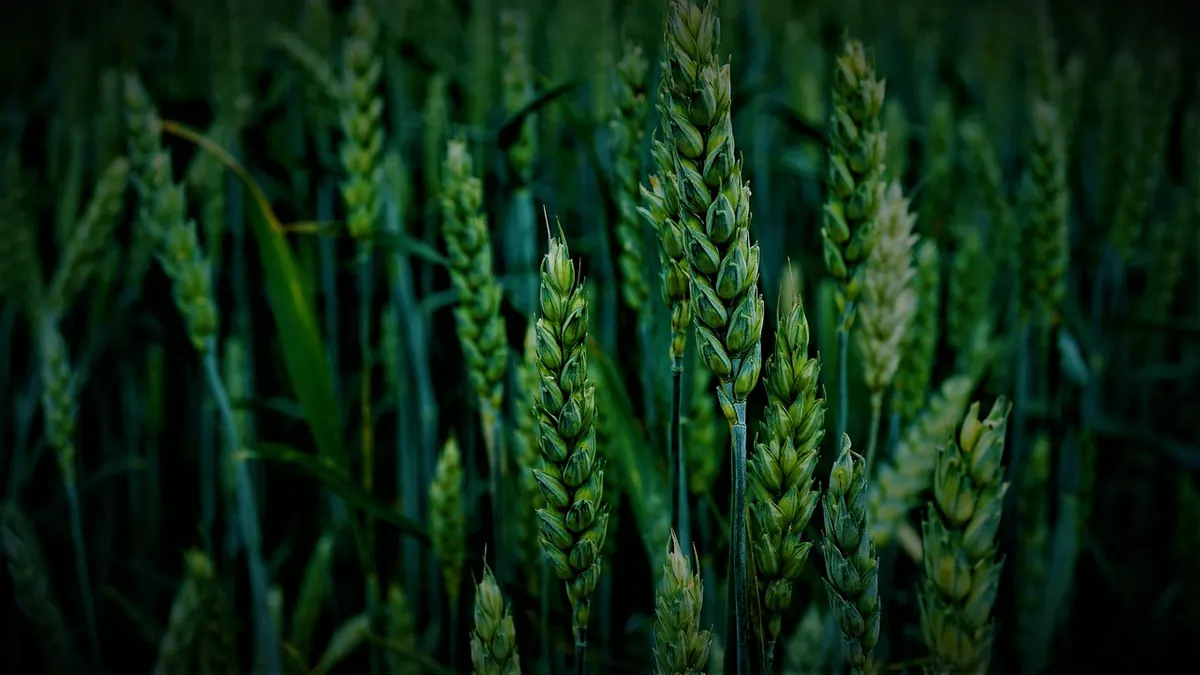
A ripe wheat ear is a compact set of clues. The shape of the head, the length of the awns, the color of the glumes, and the look of the grain all point toward a type—but none of them tells the whole story alone. The useful skill is not memorizing a single perfect key. It is learning which features are stable, which shift with weather and nutrition, and how to combine them into a sensible identification. This guide is for growers, seed savers, students, and anyone who wants to walk a field and read the crop with more confidence.
Start with the crop, not the ear
Before you pull an ear apart, establish what you are looking at. Common wheat—Triticum aestivum—includes winter and spring types, and the market classes hard red, soft red, hard white, and soft white. Those labels describe grain quality and end use, not a single plant shape. A hard red winter wheat and a hard red spring wheat can look remarkably similar in the head; their sowing season and growth habit, not the ear alone, separate them in practice.
Growth habit is worth noting earlier in the season, even if you are making the final call at maturity. Winter wheat usually forms a low, spreading rosette before winter and then joints and heads in late spring or early summer. Spring wheat is sown after the last frost and typically moves from emergence to heading without a cold dormant period. By the time the ear is ripe, that distinction is mostly historical, so record it while you can or ask the person who planted the field.
Walk well into the field, away from the headland and odd patches. Sample ten to twenty ears from different plants, not one attractive head at the edge. Volunteer wheat, mixtures, and outcrosses can fool you. If the crop came from certified seed, the label is your first reference; if it came from a farm bin or a seed swap, treat the name as a hypothesis until the evidence agrees. Also note the field’s history: a crop after a poor season may be shorter and thinner than the same variety after a good one, and late tillers often produce smaller, less typical ears.
Read the ear: outline, density, and awns
Look at the ear in profile before you touch it. Three broad outlines cover most common wheat: fusiform, tapering at both ends; club, wider and blockier near the tip; and parallel, with sides that stay roughly even. Length matters less than proportion, because a long ear on poor ground can be shorter than a short ear on good ground. Still, note whether the head is compact and crowded or lax, with visible gaps between spikelets.
A club-type head often looks almost like a small bat or club, broad near the tip and narrower at the base. A fusiform head narrows more evenly, while a parallel head keeps a steady width for much of its length before tapering at the very top. These shapes are most useful when you compare several ears from the same field. One odd head may simply be a tiller that emerged late or a plant growing in a wheel track.
Awns: the first big fork
Awns are the bristles rising from the glumes. Wheat can be awnless, awnletted (short stubs), or fully awned. At ripening, note awn length, color, and feel: some are rough and stiff, others finer. Awns help, but they are not a verdict. Awn expression can vary with season and position in the field, and an awned variety may look less fierce in a lean year. Check several ears at the same stage, and look at the awns on the upper and lower spikelets.
Awns may also be spreading, appressed, or twisted, and their color may differ from the glumes beneath them. At maturity, glumes and awns may read white, yellow, tan, brown, or nearly black. Color is easier to compare in flat, indirect light; strong sun bleaches one side and shadows the other. Photograph the ear against a neutral card with a scale, then turn it ninety degrees and photograph it again. The second view often shows a shoulder or beak you missed.
The glumes tell a quieter story
The glumes are the paired husks around each grain. With a hand lens, look at the keel, the shoulder, and the beak. Is the shoulder square, sloping, or rounded? Is the beak short and blunt or long and curved? Are the glumes hairy or smooth? Is the keel a sharp ridge or a soft line? These are the details breeders and seed inspectors use, and they are more reliable than an overall impression of “red” or “white.”
Glume length relative to the grain is another useful check. In some varieties the glumes are noticeably shorter than the mature kernel; in others they almost enclose it. Squeeze a spikelet gently and look at how the grain sits. Does it protrude? Is the spikelet easy to thresh by hand, or does it hold the grain tightly? These small observations add up, especially when you are comparing two varieties that share the same awn type and head shape.
Do not expect one glume to identify a variety. Use a group: three ears from different plants, viewed from both faces. Note whether the glumes are glaucous—the waxy, blue-green bloom that can persist on stems and heads. Glaucousness can fade, so treat it as supporting evidence. A simple notebook entry works better than memory: “awned, parallel, glumes smooth, shoulder square, beak short.” That sentence will do more for you than a photograph alone.
Grain color and kernel texture
Once the grain is mature and dry, thresh a few spikes by hand. Color is the first screen. Red wheat has a reddish-brown bran layer; white wheat has a pale bran that ranges from cream to ivory. Rub a kernel clean or cut it, and compare it with a known sample. Then test texture. Hard wheat kernels are usually vitreous—glassy, translucent, and resistant to crushing. Soft wheat kernels are opaque and floury, and they crush more readily. This hardness is the trait that sends wheat toward bread or toward pastry, so it is worth learning to see and feel.
Kernel shape and size also deserve a note, though they are less diagnostic than color and hardness. Some varieties produce plump, rounded kernels; others are longer and narrower. Do not rely on size alone, because moisture, fertility, and position on the ear all affect it. Instead, compare a cleaned sample of ten or twenty kernels from the middle of several ears, not the largest kernels at the base.
A four-step kernel check
- Sample clean, dry grain from several ears. Green or shriveled kernels distort color and texture.
- Check bran color in daylight against a white card. Be careful: dust makes every kernel look pale.
- Cut a kernel crosswise with a sharp knife. A hard wheat kernel usually shows a glassy, horny endosperm with little white floury material; a soft wheat kernel cuts mealy and opaque.
- Compare with a known reference from the same season if possible. Label the sample with field, date, and any suspected variety name.
Putting the clues together
Identification works best as a sequence of filters, not a single glance. Start broad: is the crop common wheat rather than barley, rye, triticale, or oats? Then narrow by awn type and head outline. Next, use glume details to separate varieties that share the same general silhouette. Finally, confirm with grain color and texture when the sample is dry enough to thresh.
Suppose you have an awned, parallel-sided head with smooth glumes, a square shoulder, and a short beak. The grain is red and glassy. That combination points toward a hard red wheat, but it does not name the variety by itself. If you also know the field was sown in autumn, the crop survived winter, and the seed tag said a hard red winter wheat, the evidence is much stronger. If the same head came from a spring-sown bin run, the reliable conclusion may simply be “hard red wheat, variety uncertain.”
The ear narrows the field; the grain and the field history confirm it. A good identification is a case built from several witnesses, not a confession from one.
Keep a simple record for each sample: date, location, crop class, awn type, head outline, glume notes, grain color, grain texture, and any known seed source. Add a photograph of the head from two angles and a close-up of the grain. Over a few seasons, that notebook becomes more useful than a generic key because it reflects your soils, your weather, and the varieties actually grown around you.
Look-alikes and false shortcuts
Several small grains can be mistaken for wheat at a distance, and a few shortcuts cause more confusion than they resolve. Use these checks before you commit to a name.
- Barley: often has longer awns and a different spikelet arrangement; the grain usually has a husk that stays attached after threshing, while common wheat threshes free.
- Rye: tends to be taller and more blue-green, with longer, stiffer awns and a narrower, more open head in many types.
- Triticale: a wheat-rye hybrid that can combine wheat-like glumes with rye-like vigor and awn length; treat it as a separate crop, not a wheat variety.
- Oats: have a loose, branching panicle rather than a compact spike, so the overall head shape is a quick separator.
- One-ear identification: tempting but unreliable. A single ear may be atypical, damaged, or from a volunteer plant.
- Color alone: red or white bran is useful, but weathering, dust, and immature grain can mislead. Confirm with texture and glume details.
Finally, be comfortable with uncertainty. Common wheat includes many varieties and market classes, and some are genuinely difficult to separate from the ear and grain alone. A confident field identification should end with the evidence you actually have: “awned, club-type head, white grain, soft texture—likely a soft white wheat,” rather than a variety name the sample cannot support. That habit keeps your records honest and makes the next identification easier.
Photo: Mylene2401 / Pixabay